This article will show you how to make a shutter release cable for a Canon camera. It took me about half an hour once all of my materials were gathered. I came in at a total of about eight dollars. It has three switches and buttons. The black button on mine triggers the auto focus. The red button triggers the shutter. Finally, the switch triggers the bulb mode, or long exposure. This can be used to take astronomical photos that show the movement of the stars in the picture. The release cable in general can be used to take close-ups of wild animals or group photos with everyone in it.
Materials
- A utility lighter (or anything you can put the finished product into)
- A long roll of wire
- Two push button switches (make sure these are push-to-connect switches instead of push-to-break switches)
- An on-off toggle switch or rocker switch
- A 2.5mm or 3/32 inch stereo plug (in my case)
- Duct tape
- Glue
Tools
- Scissors
- Soldering iron
- Wire stripper
- X-ACTO knife
- Drill with various bits
Picking the Plug
Depending on your camera, there will be different plugs on the side of the camera. Mine has three plugs. On the bottom there is a mini USB plug to transfer the photos to a computer, and has the standard three-arrow USB symbol. The middle is a plug for external control, and has a picture of a box on a loop going to a plug, which stands for a shutter release cable. Things that can be plugged into this are intervalometers and standard shutter releases. Mine was a 2.5mm plug, one millimeter smaller than the standard headphone plug, but it could be a three pin plug or a 3.5mm for some cameras. The top plug is labeled "Video out", and has a 3.5mm jack. I'm not quite sure what this is because the Canon Rebel XS, my camera, does not have video capability. This will specifically focus on the 2.5mm plug, which almost all Canon cameras have.
Connecting the Switches
These are the parts I used. The 2.5mm jack in this isn't the one I actually use, because it is still connected to the headphones. I went to Radio Shack and bought another. Remember that there should be 3 connections on the jack, and two black rings on the metal part.

There are 12 connections you have to make. This is a diagram of what you have to connect, and what they do:

I made the wire connecting the plug to the switches about twelve feet. By the time I was done, I had a mess of wire and I had to untangle it all.


Encasing the Project
If you are using a project box, this is very easy. First, I gutted the whole utility lighter. You should keep the electric gas lighter, as this can be used in a lot of projects.

That little black thing with the yellow and white wires is the gas lighter. I later made it into a mini taser. I forgot to thread the wires through the metal tube, so if you want to, remember to do this before you connect the wires.

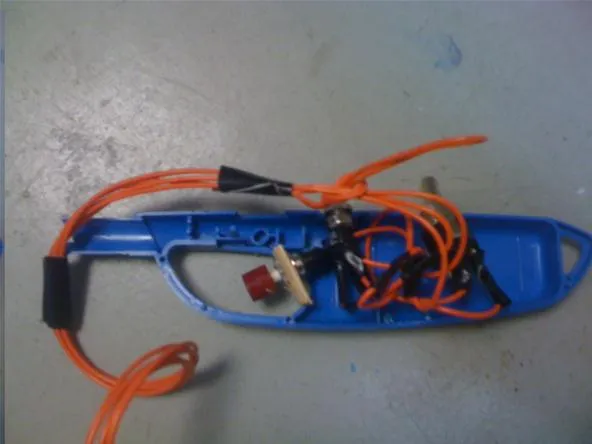
I attached the push button to a piece of wood to fill the trigger gap and then glued it in place with Gorilla Glue.

Under the mess of wires, the buttons are in position of where I want them. Obviously, it doesn't matter where the buttons are placed. For the rest of the buttons, I clamped the plastic shut and drilled through the plastic with a bit a little larger than the button base.

This is the completed shutter release. I have installed the button and the switch on the top. The button doesn't have the black cap on it, though. I am thinking about painting it if I have time. Have fun and be creative! Post any questions below.


Comments
Be the first, drop a comment!